DRGSNZ - Technical Edition
For anyone curious as to how this project is put together, with a bit of Godot experience, it's available on GitHub as a public, MIT-licensed project https://github.com/SethRaeder/Zephyr. I'll explain some of the more technical stuff below.
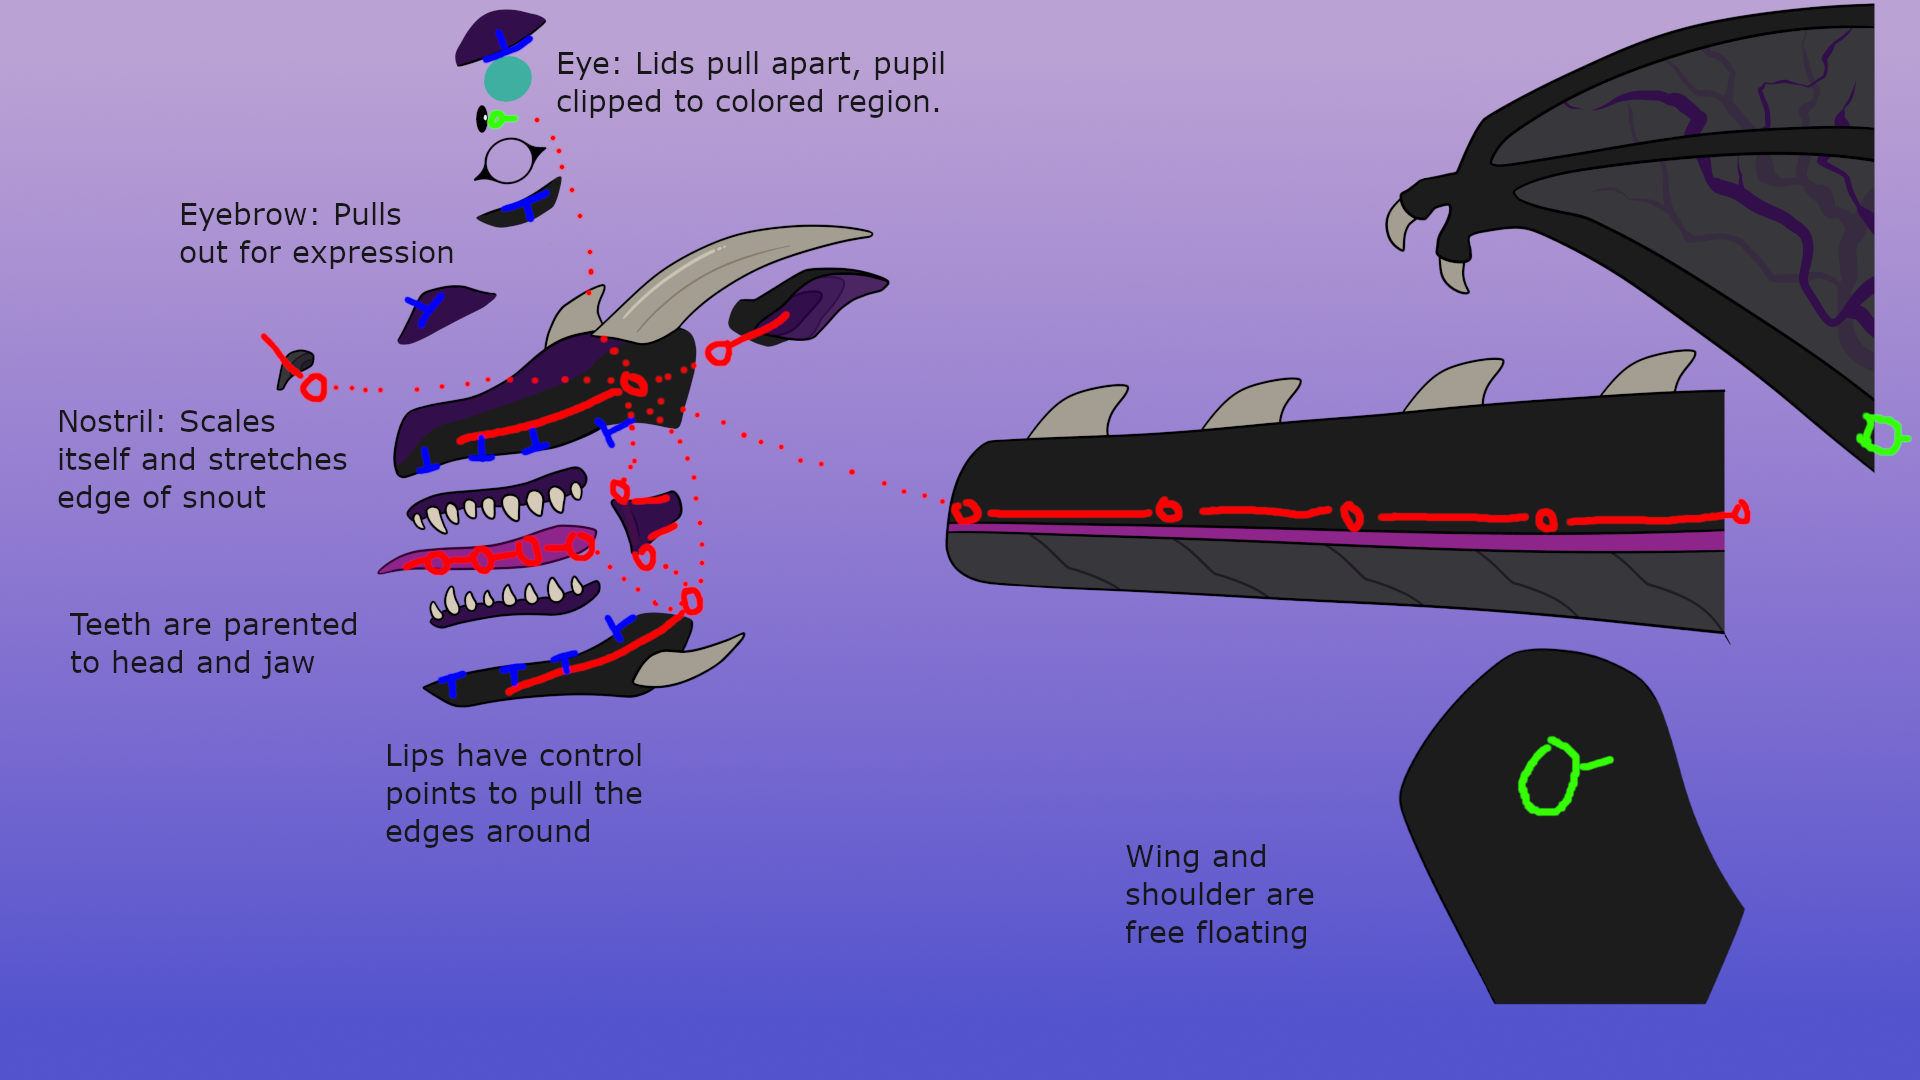
For Kel, her main asset looks like this - 17 individual sprites that I layer in the correct arrangement. It is set up this way so that the sprites can be deformed to create almost any expression I may need - the eyes can blink and widen, eyebrow flex, lips curl, so on and so forth.
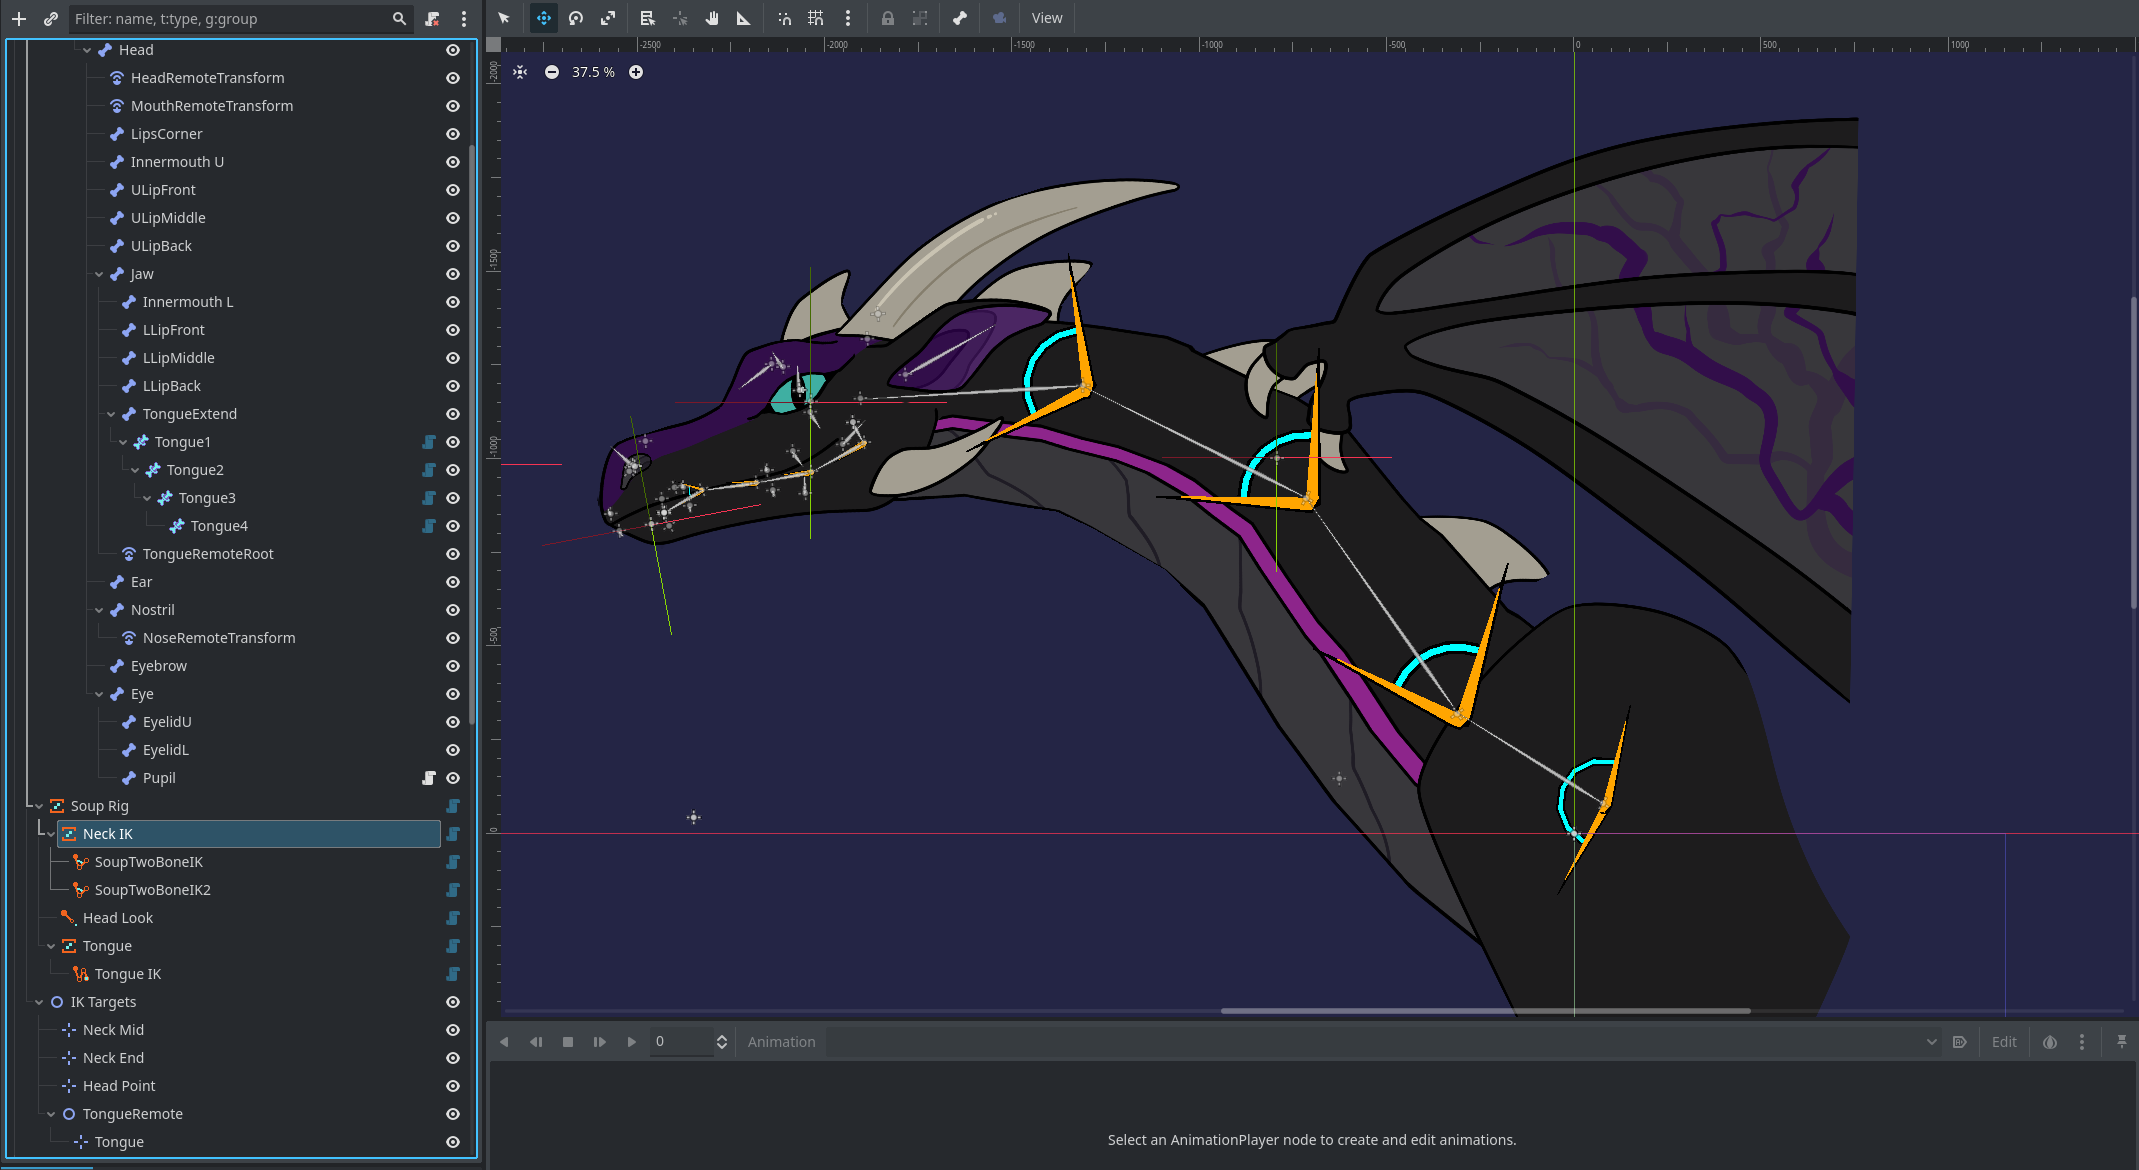
In Godot, her skeleton looks a little like this. I use the Souperior 2d skeleton addon (https://github.com/ZedManul/souperior-2d-skeleton-modifications) to manage the inverse kinematics her neck and head use.
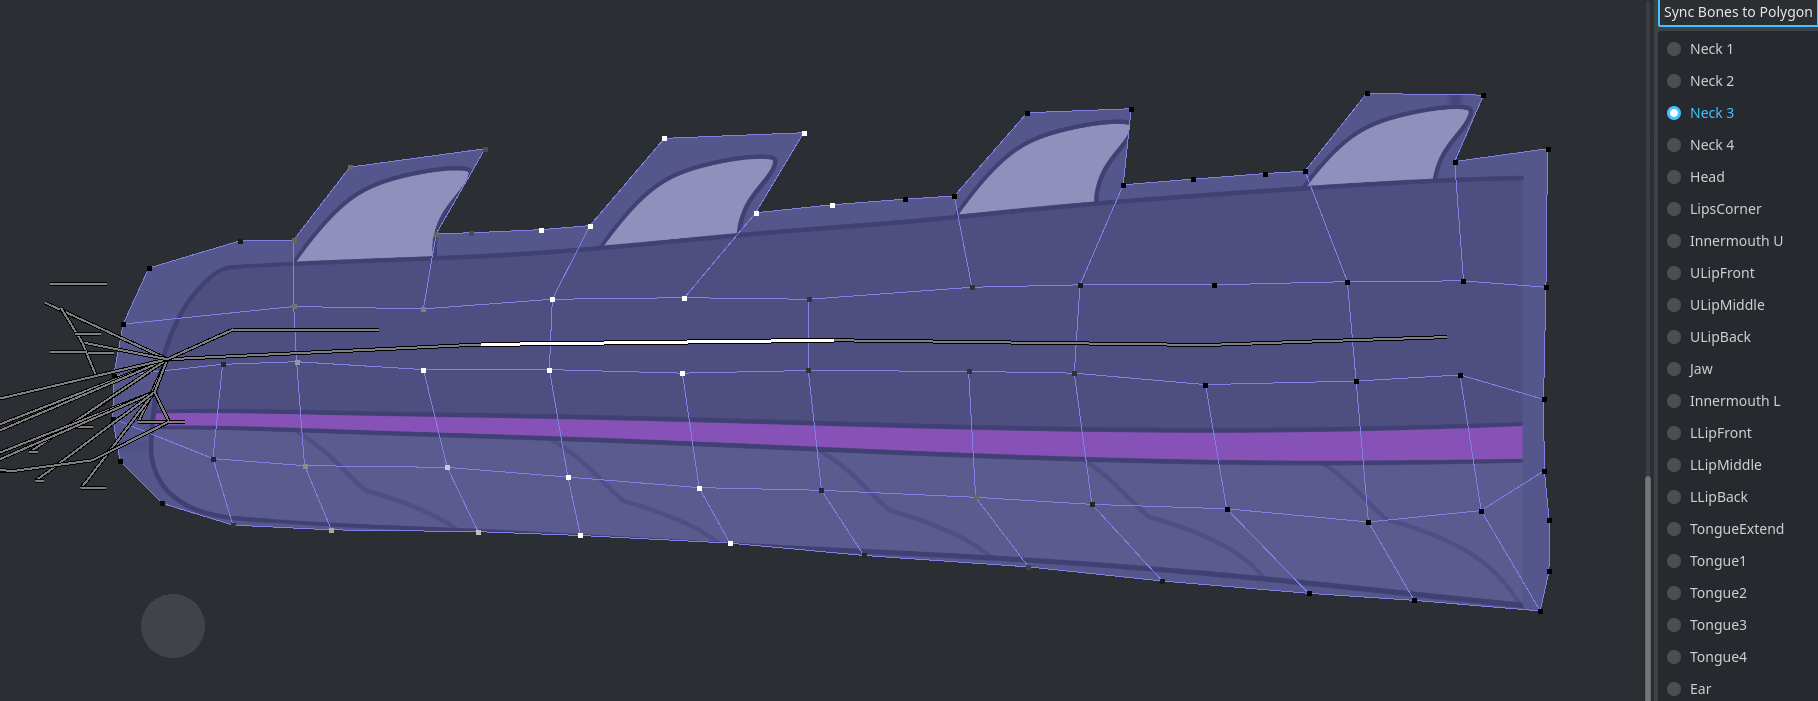
Each sprite has weights painted into vertices, for the bones that should effect them, as seen on this image of the 3rd neck bone.
This portion of a character, as well as their animations, will likely need to be custom or done via a recolored base for every character added to the game, especially those with different anatomy. It's a decent amount of work - I would estimate it takes about 5 hours to set up the character and skeleton if you've already got the sprites handy.
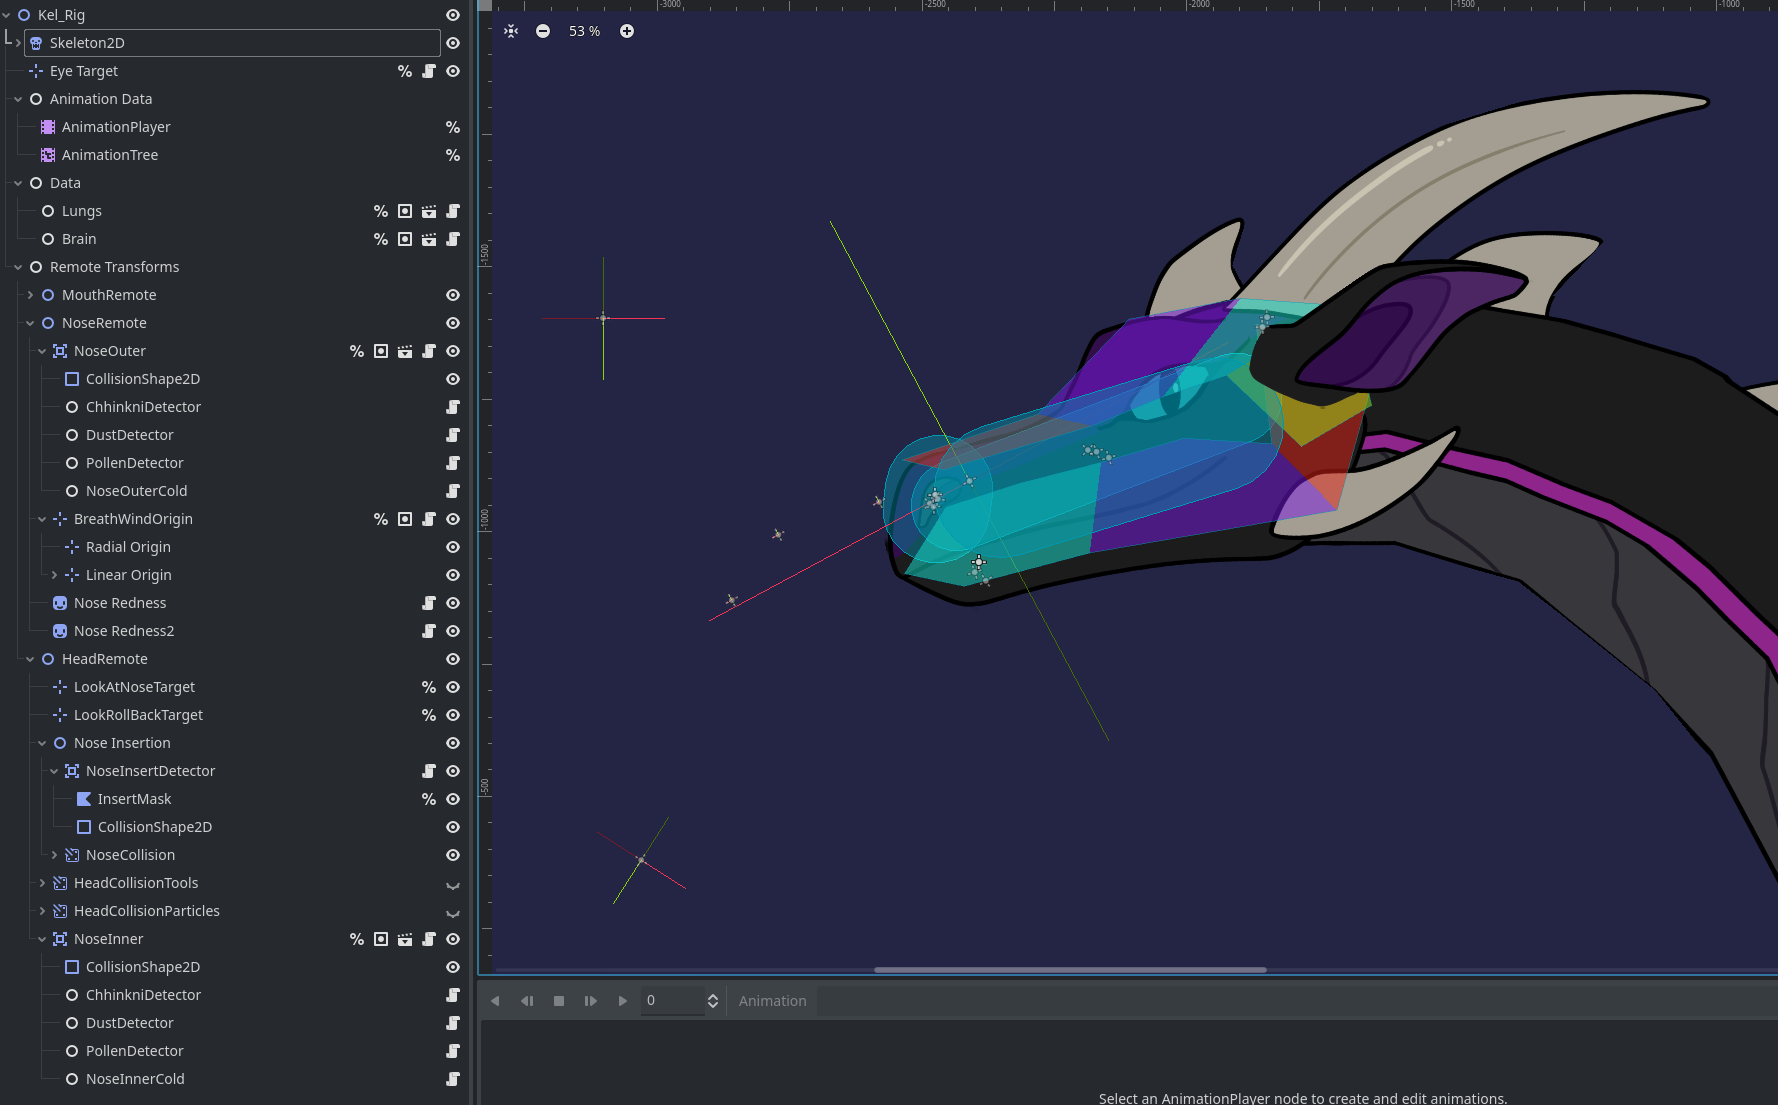
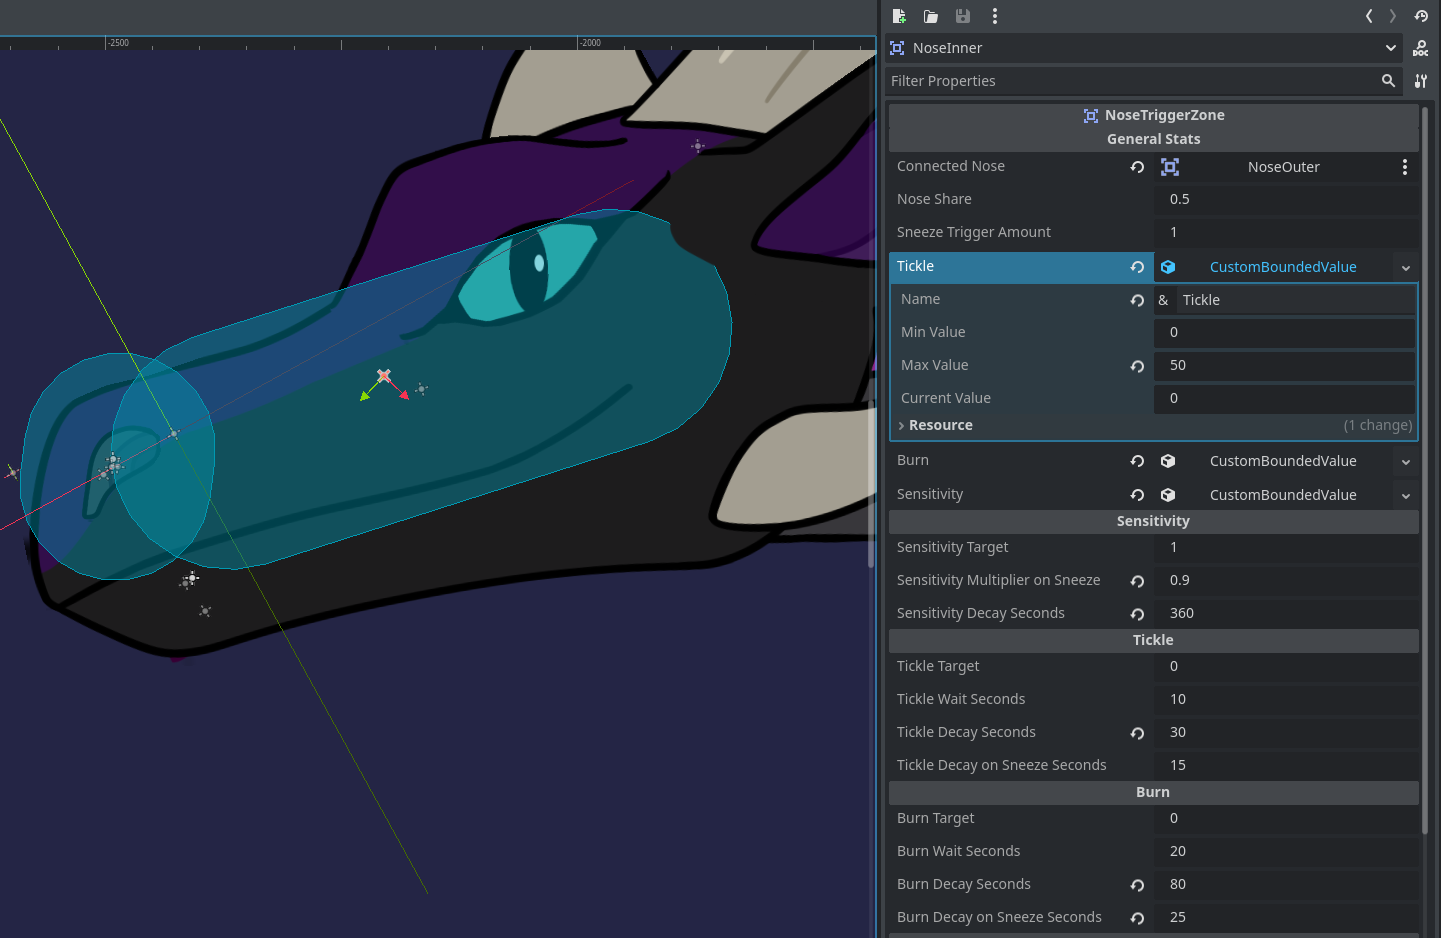
Once you have a character rigged, things get a bit easier. Here you can see a selection of the collision areas for nose tool detection, and nose collision physics with inserted tools.
Characters run off of a Brain node, managing the overall sneeze level and chances to sneeze.
The Lungs node tracks the quantity of air in the lungs and the amount of "oxygen" in their system, which determines if they need to take a breath.
The Nose nodes act as accumulators for tickle and burn, sending tickle signals to the Brain node. They have a sensitivity value which multiplies the chance to send a signal each time they trigger.
WindOrigin nodes do some funky vector math to determine what direction something should be blown, depending on if the attached Lungs node is breathing in or out, and a configured set of "radial" and "linear" components. Mathematically it looks like this (it's pretty awful!)
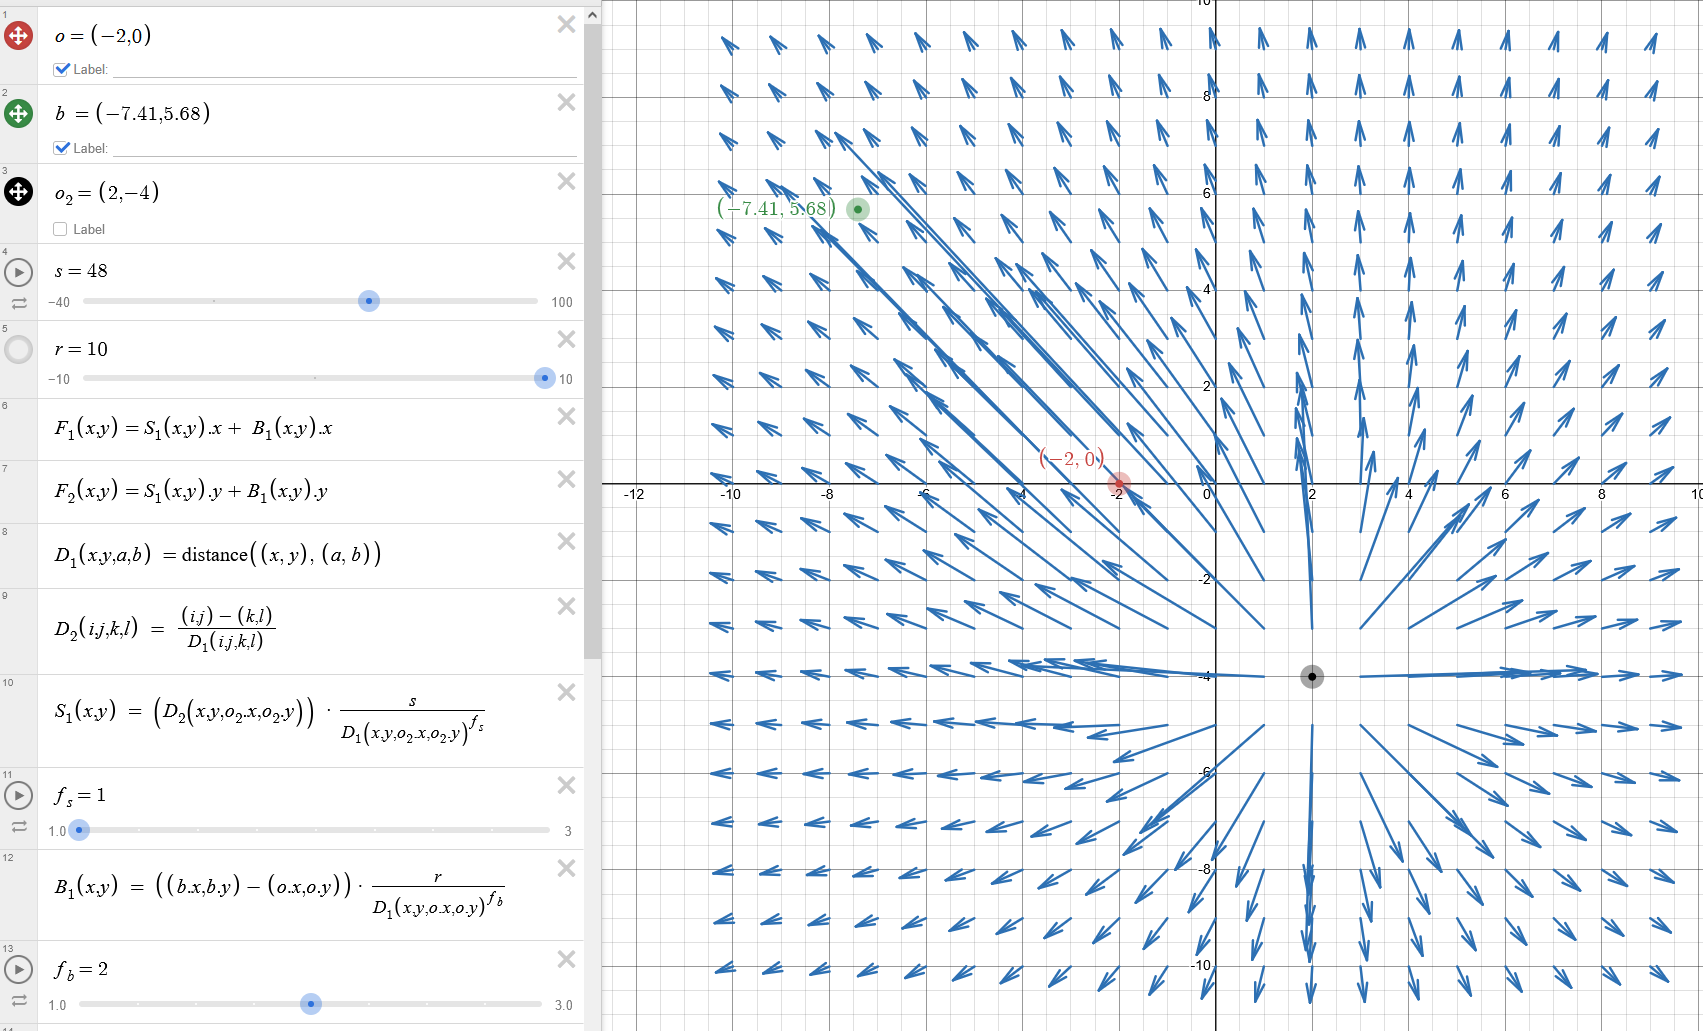
Thankfully, in the program, it's not so complicated. A lot of this boils down to just getting the distance or direction between two points!
Tools are very modular - probably some of my best programming work to date. Each is a physics-simulation rigid body with a collision shape that appropriately matches its sprite. You can stick a GrabTransform node on the tool to define where it should snap to the mouse and how much force should be applied to bring it there.
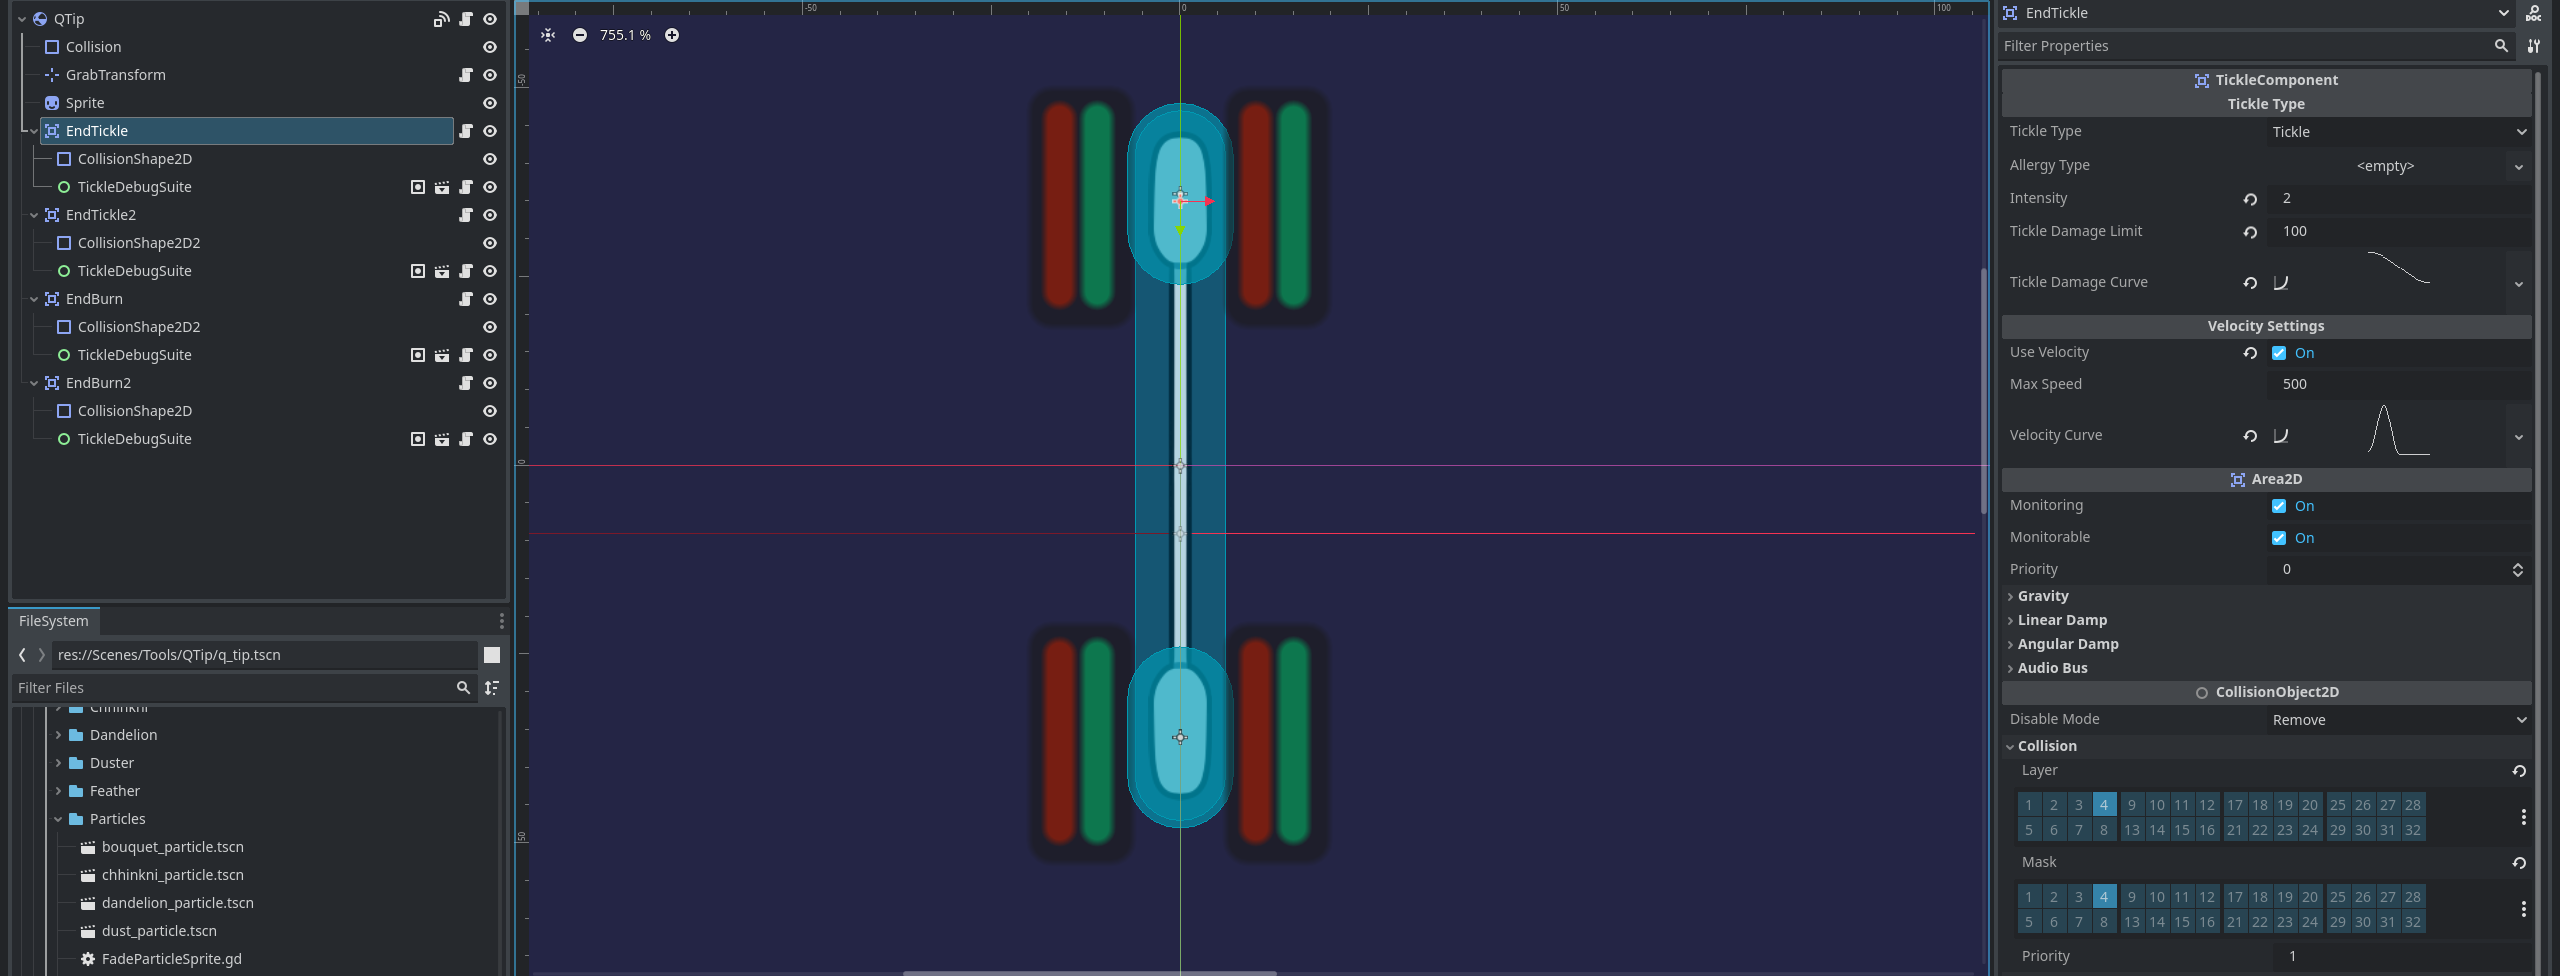
TickleComponents are multipurpose, able to apply tickle, burn, sensitivity and allergy damage to a detected nose hitbox. The raw intensity can be tweaked as damage per second, and you can give them different effectiveness at various tool speeds, an optional damage limit (durability!) and damage profile across its durability. Particle spawner nodes can be set to spawn particles over a certain speed or acceleration, with attached Wind listener nodes spawning if the local wind is high enough. Particles are essentially the same setup as tools, rigid bodies with TickleComponents to apply their damage.
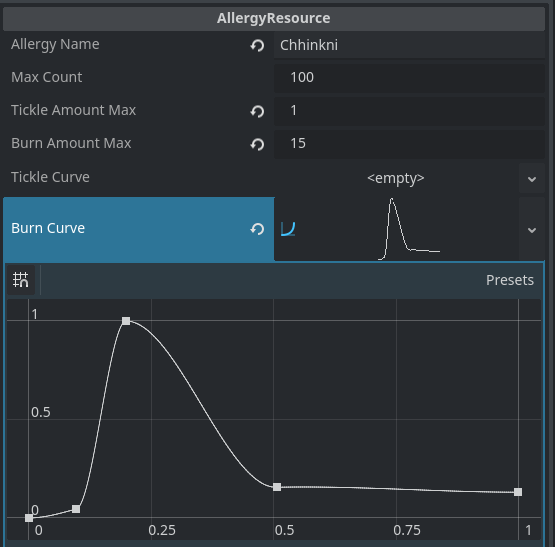
Allergens (anything that should apply a lingering damage effect, so dust, pollen and sneezing powder) are configurable resources which TickleComponents can use as their damage type. You can attach a listener of that allergen type to the nose hitbox of your choice, and it will accumulate allergen counts to drive tickle and burn amounts over time. The curves of the AllergyResource define what percent of the max tickle/burn is applied, depending on the progression of the reaction (see Time to Max Progress in the second image).

Hope this read was interesting! This isn't a full technical breakdown, but it should be a neat insight.
Leave a comment
Log in with itch.io to leave a comment.